Overview of DIY Hose Guides
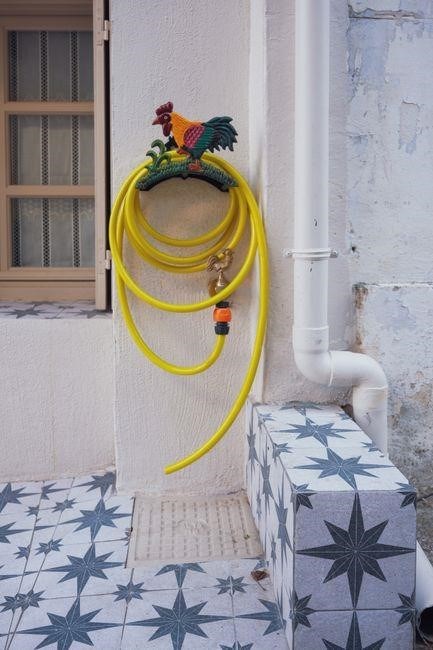
DIY hose guides help keep garden hoses organized‚ prevent tangles‚ and extend hose life. By mounting guides along walls or posts‚ you reduce wear and improve accessibility. Simple materials like PVC‚ metal brackets‚ or repurposed bottles can be used. They also reduce trip hazards and improve hose longevity.!!!
Types of Hose Guides and Their Applications
Garden hoses can be guided in several ways‚ each suited to a particular layout or usage scenario. The most common categories are wall‑mounted‚ floor‑mounted‚ mobile‚ and adjustable guides. Wall‑mounted guides are simple brackets or rails that attach to a fence‚ shed‚ or wall. They keep the hose neatly coiled‚ prevent kinks‚ and free up yard space. Floor‑mounted guides use a low‑profile rail or track that sits on the ground‚ ideal for driveways or patios where a wall is unavailable. Mobile guides are lightweight frames or carts that can be moved to different spots‚ useful for seasonal watering or when the hose needs to be stored in a garage. Adjustable guides combine the benefits of wall and floor mounting; they feature a pivoting arm or a sliding rail that can be repositioned to accommodate varying hose lengths or garden layouts. Each type can be built from PVC pipe‚ stainless‑steel brackets‚ or even recycled wine bottles‚ depending on budget and aesthetic preference. The choice depends on factors such as the hose’s length‚ the frequency of use‚ the terrain‚ and the desired level of permanence. Proper selection ensures that the hose remains kink‑free‚ reduces wear‚ and keeps the watering area tidy. Choosing the right guide type and material helps avoid costly repairs‚ reduce water waste‚ and improve outdoor safety and appeal. and also keeps hose life. ! When installed correctly‚ these guides also act as an aesthetic element‚ blending seamlessly with garden décor while supporting hoses of all sizes!!
Choosing the Right Materials
Durable options include PVC‚ stainless steel‚ and nylon straps. PVC offers low cost and easy cutting‚ while steel resists corrosion. Nylon straps provide adjustable tension and can be reused‚ making them ideal forgardens. Choose based on budget‚ climate‚ and hose size!!
PVC‚ Stainless Steel‚ and Flexible Options
When selecting a hose guide‚ consider durability‚ flexibility‚ and installation ease. PVC is lightweight‚ inexpensive‚ and resistant to UV and corrosion‚ making it ideal for outdoor use. It can be cut to length with a hacksaw and secured with hose clamps or zip ties. Stainless steel offers superior strength and longevity‚ especially in harsh climates. Thin‑profile steel brackets or U‑shaped guides can be bolted or screwed into masonry‚ providing a permanent‚ low‑maintenance solution. Flexible options‚ such as nylon or rubber straps‚ allow the guide to conform to irregular surfaces and accommodate hose diameter changes. These straps can be tensioned with adjustable buckles or Velcro‚ enabling quick removal for maintenance or seasonal storage. Each material choice balances cost‚ performance‚ and aesthetic integration with the garden or yard design. Proper selection ensures the guide stays in place‚ protects the hose from kinks‚ and extends overall lifespan.
Choosing the right material also involves evaluating environmental factors such as temperature swings‚ UV exposure‚ and soil acidity. PVC performs well in moderate climates but may degrade under prolonged UV‚ whereas stainless steel offers resilience against rust and chemical corrosion; Flexible nylon straps excel in uneven terrain‚ allowing the guide to bend without compromising hose integrity. For high‑traffic areas‚ consider double‑layered guides or reinforced brackets to distribute load and prevent sagging over time.
Save today! Now.
Tools Required for Installation
Essential tools: a measuring tape‚ level‚ drill with masonry bits‚ screwdriver‚ wrench set‚ pipe cutter for PVC‚ zip ties‚ hose clamps‚ and mounting brackets. Keep a safety mask and gloves handy for a clean‚ efficient setup. Ensure level for hose placement gently
Cutting‚ Measuring‚ and Fastening Tools
For a smooth hose‑guide installation‚ start with a reliable measuring tape—ideally 25‑foot to cover most garden runs. A digital level ensures each bracket sits perfectly horizontal‚ preventing hose sag. A cordless drill with a 1‑inch masonry bit is essential for anchoring brackets into brick or concrete walls. A 3‑inch drill bit works well for wood posts. A pipe cutter or adjustable hacksaw trims PVC guide tubes to the exact length needed; keep the blade sharp for clean cuts. A wrench set (both adjustable and 3/8‑inch) tightens hose clamps and screws without stripping. A small screwdriver (Phillips and flathead) handles bracket screws‚ while a socket wrench secures larger mounting hardware. Zip ties or cable ties are handy for temporary positioning during adjustments. A pair of pliers helps grip hose clamps and remove old fittings. Safety gear—gloves‚ safety glasses‚ and a dust mask—protects against splinters and dust. With these tools‚ you can measure‚ cut‚ and secure hose guides efficiently‚ ensuring a tidy‚ durable setup that keeps hoses from tangling and extending their lifespan. Additionally‚ a small utility knife can trim plastic sleeves‚ and a heat gun helps seal PVC joints. A torque wrench ensures bolts are tightened to manufacturer specifications. A marker or chalk line aids in marking precise bracket positions before drilling. A small bucket or container keeps debris from accumulating during the process. Finally‚ a flashlight or headlamp is useful for working in dimly lit areas. Use a level to double‑check alignment before securing brackets. All tools should be cleaned after use. Proper storage prevents rust and keeps them!!
Step-by-Step Installation Guide
Begin by measuring hose length and marking guide positions. Cut guide tubes to size with a pipe cutter. Drill pilot holes‚ then secure brackets with screws. Slide hose into guide‚ clamp ends‚ and tighten. Check alignment‚ adjust as needed‚ and secure all fasteners firmly. Inspect joints for leaks‚ quick!
Preparing the Hose and Guide Surface
Before installing a hose guide‚ clean both the hose and the mounting surface to ensure proper adhesion and prevent corrosion. Remove dirt‚ grime‚ and old sealant with a wire brush or sandpaper. For metal surfaces‚ use a rust remover and then wipe with a lint‑free cloth. For wood‚ sand lightly and apply a primer if the wood is porous. Next‚ inspect the hose for kinks or damage; straighten any bends and replace any cracked sections. Measure the desired guide length and mark the mounting points with a pencil. Use a level to keep the guide straight and a drill to create pilot holes. When drilling into metal‚ use a drill bit slightly smaller than the screw diameter to avoid stripping. After drilling‚ wipe away dust and apply a small amount of epoxy or silicone sealant to the screw heads before inserting. This step ensures a watertight seal and reduces vibration. Finally‚ test the hose by running water through it to confirm that the guide holds the hose firmly without slipping or leaking.
Additional steps include checking the hose for any hidden damage before installation. If the hose is older‚ consider replacing it entirely to avoid future leaks. When mounting‚ ensure the brackets are level to prevent wobble. Tighten all screws firmly‚ but avoid overtightening which can crack the hose or strip the screw threads. Finally‚ after installation‚ run water through the hose to confirm a secure fit and no leaks. Remember to inspect the hose for any manufacturing defects before use‚ and always keep a spare hose in case of future repairs. now!
Securing and Anchoring Techniques
Secure hose guides by mounting brackets to walls or posts. Use screws that match surface material‚ drill holes‚ and apply silicone sealant for a watertight bond. Tighten screws‚ but avoid tightening to prevent damage. Check alignment with a level before tightening
Installing Mounting Brackets and Hangers
Installing mounting brackets and hangers is the cornerstone of a durable hose guide system. Begin by selecting brackets that match the hose diameter—most commercial brackets accommodate 1.5 to 2‑inch hoses‚ while custom brackets can be fabricated from PVC or stainless steel. Position the brackets at 12‑ to 18‑inch intervals along the wall or post‚ ensuring that the spacing allows the hose to bend smoothly without kinks. Use a level to verify that each bracket sits perfectly horizontal; a tilted bracket can cause uneven pressure and premature hose wear. Mark the screw holes with a pencil‚ then drill pilot holes that match the screw diameter. For wood or drywall‚ use masonry or drywall anchors to secure the screws; for metal posts‚ pre‑drill and use self‑tap screws. Apply a thin bead of silicone sealant around the bracket’s mounting flange before inserting the screw to create a watertight seal that also dampens vibration. Tighten the screws firmly but avoid over‑tightening‚ which can crack the bracket or damage the wall. Once all brackets are mounted‚ slide the hose into the guide‚ ensuring it rests evenly on each bracket. If the hose is long‚ use a hose hanger or a flexible hose clamp to keep the hose from sagging between brackets. Finally‚ inspect the entire assembly for any loose connections and adjust as needed. A well‑installed bracket system not only keeps the hose organized but also extends its service life by preventing abrasion and tangling. Additionally‚ consider using heat‑shrink tubing over the bracket mounting area to protect the hose from direct contact with the metal‚ which can accelerate corrosion. If you prefer a minimalist look‚ repurposed wine bottles can serve as decorative brackets; cut the bottles to fit the hose diameter and attach them with epoxy‚ then secure to the wall with small screws. Use a quick‑release clamp at the end of the hose to allow easy removal for maintenance. Ensure the brackets are spaced so that the hose can be fully extended without forcing it through a tight corner. Always test the hose guide by running water through the hose to check for leaks or movement before finalizing the installation. After installation‚ perform a quick pressure test by turning on the faucet; watch for any seepage at the bracket joints. If leaks appear‚ tighten the screws slightly or reapply sealant. Regular maintenance involves cleaning the hose and brackets of debris‚ inspecting for cracks‚ and replacing any worn components promptly. By following these steps‚ you create a reliable‚ low‑maintenance hose guide that keeps your garden neat and your hoses protected.

Common Issues and Troubleshooting
Common problems include hose kinks‚ bracket loosening‚ and sealant failure. Check for water spots‚ tighten screws‚ replace cracked clamps‚ reapply silicone. If leaks persist‚ inspect for metal corrosion and replace worn guides. Clean cleaning prevents blockages!!!
Identifying Leaks‚ Cracks‚ and Wear
When inspecting hose guides‚ start with a visual sweep for obvious signs: water stains‚ discoloration‚ or frayed edges. Look for small holes or pinholes where the hose meets the guide; these often appear as faint dark rings. Use a flashlight to spot micro‑cracks that reflect light unevenly. Next‚ run water through the hose at moderate pressure and observe the guide’s surface. A steady‚ clean flow indicates a secure seal; any dripping or misting suggests a compromised joint. For metal guides‚ check for rust pitting or burrs that can snag the hose. Plastic or PVC guides may show crazing—tiny white lines that indicate brittleness. A simple pressure test involves pressurizing the hose to 30 psi and holding the guide in place; if pressure drops‚ the seal is broken. Finally‚ feel for loose fittings—if the guide moves when tugged‚ the mounting screws or brackets may be worn or corroded. Document any findings with photos for future reference. Inspect the guide’s mounting hardware for rust or loosening; a loose screw can cause the hose to shift‚ leading to kinks. Use a torque wrench to tighten bolts to the manufacturer’s recommended torque. Check the hose’s inner diameter against the guide’s groove; a mismatch can create uneven pressure and accelerate wear. For outdoor use‚ apply a silicone sealant around the joint to prevent water ingress. Finally‚ periodically reapply a thin layer of lubricant to metal guides to reduce friction and extend lifespan. Regular inspections save time and money. Keep them clean and dry
Maintenance and Longevity Tips
Clean guides weekly‚ remove debris‚ inspect for cracks. Lubricate metal brackets with silicone spray. Replace worn hoses after 3 years. Store hoses coiled‚ not kinked. Check fasteners monthly‚ tighten loose screws. Use UV‑resistant covers to protect from sun. Keep guides dry to avoid rust. Check yearly!Now
Cleaning‚ Replacing‚ and Extending Lifespan
Regular cleaning is the first step in preserving hose guides. Remove accumulated dirt‚ leaf litter‚ and mineral deposits with a mild detergent solution and a soft brush. For metal guides‚ apply a rust‑inhibiting primer before repainting to prevent corrosion. Inspect all fasteners every season; tighten or replace any loose screws or brackets. When a guide shows signs of wear—such as cracking‚ warping‚ or persistent leaks—replace it immediately to avoid damage to the hose. Use high‑quality‚ UV‑resistant hose material to extend its life. Store hoses coiled‚ not kinked‚ and keep them away from direct sunlight when not in use. Periodically check the hose’s inner lining for cracks; replace the hose if the lining shows wear. By following these maintenance steps‚ you can significantly extend the lifespan of both the guide and the hose‚ ensuring reliable performance for years.
To further protect the guide‚ apply a thin coat of clear silicone sealant around the mounting points‚ which helps seal gaps and reduces moisture infiltration. Additionally‚ consider installing a drainage channel along the guide’s base to prevent standing water. Finally‚ schedule a quarterly inspection to catch early signs of wear‚ and replace any worn components promptly to maintain optimal hose performance. All these steps ensure a durable‚ efficient hose system.
Moreover‚ installing a small rubber gasket at the hose connection point can further reduce vibration and prevent leaks‚ especially during heavy watering sessions!!!!
Cost and Budgeting Considerations
DIY hose guides can cost $5–$30 per guide depending on material. PVC brackets are the cheapest‚ while stainless steel adds durability but raises price. Labor is minimal—most homeowners can install in 30 minutes‚ saving $50–$100 on professional services. Plan for replacement every 5–7 years to keep costs
Material Costs‚ Labor‚ and DIY Savings
When budgeting a DIY hose guide project‚ consider three main cost drivers: material‚ labor‚ and long‑term savings. A standard 12‑inch PVC guide costs roughly $3–$5‚ while a stainless‑steel bracket can range from $8 to $15. Aluminum options sit between‚ at $5–$7. Repurposed glass bottles‚ if cleaned and sealed‚ can be a zero‑cost alternative‚ though they may need additional adhesive or mounting hardware. The choice of material also influences installation time; PVC is easy to cut with a hacksaw‚ while metal requires a drill bit and a metal file.
Labor is minimal for most homeowners. A single guide typically takes 15–20 minutes to cut‚ drill‚ and secure. For a full 10‑guide installation‚ expect about 2–3 hours of work. If you hire a professional‚ hourly rates of $50–$80 translate to $1‚000–$1‚200 for the same job‚ whereas a DIY effort can keep labor costs near zero. If you have a power drill‚ you can speed up the process by using a drill‑driven screw driver‚ cutting the total time in half.
In terms of savings‚ proper guides reduce hose wear by up to 30%‚ extending lifespan from 5 to 8 years. Over a decade‚ this translates to a $200–$300 reduction in replacement costs. Additionally‚ fewer hose tangles mean less time spent searching for a dry run‚ saving an average of 10 minutes per week. Over a year‚ that’s roughly 5 hours of free time. Regular inspections every six months can catch early signs of wear‚ preventing repairs later.
Leave a Reply
You must be logged in to post a comment.